Whether it’s for work or off-road adventures if you’re running a winch, air compressors, portable fridge, lights, radios, or even adding USB outlets while your 4×4 is parked, your electrical system can only handle so much so a dual battery system is very much needed to help handle the extra power required without deading your vehicle’s battery
Back in the day, a dual battery setup was simple: Run a thick cable from your starter battery, slap in an isolator, throw an AGM in the back, job done.
But 2026 is a very different world:
- 4WDs now come with smart alternators
- Lithium batteries dominate touring setups
- Inverters are bigger (coffee machines, induction cookers, air fryers…)
- Fridges draw more power but run more efficiently
- People run power systems like mini off-grid stations
- Solar is now a core part of the charging plan, not a “nice-to-have”
- Accessories need proper circuit protection
- And charging a 150–300Ah lithium takes REAL power, not wishful thinking
Most beginners walk in blind. Most guides online are outdated. And most people overspend or buy the wrong gear. This guide fixes that. This is your complete, modern, step-by-step dual battery guide, built for real Australian touring conditions.
What is a Dual Battery System?
A dual battery system is a setup that uses two separate batteries in your 4WD:
- One battery starts the engine (starter battery)
- The other battery powers your accessories (auxiliary battery)
The key idea is simple: Your starter battery is protected. Your accessories run from a second battery, so you never get stranded with a flat main battery.
The auxiliary battery runs things like:
Because these accessories can drain a battery quickly, they must run from a separate power source — not your vehicle’s starting system. A dual battery system keeps everything isolated, safe, and properly charged using a DC-DC charger, solar panels, correct fusing, and quality cabling.
In short: A dual battery system gives you guaranteed power off-grid without risking your ability to start the vehicle.
Every Component in a Dual Battery System (A to Z)
Think of your 4WD power system as a chain — every link matters. Here’s your complete list:
- 1. Starter Battery
- Runs your engine, ECU, and vehicle electrics.
- 2. Alternator
- Charges your starter battery and (indirectly) your auxiliary system. Modern 4WDs use smart alternators, which DO NOT reliably charge a second battery.
- 3. DC-DC Charger
- The heart of every modern setup. Regulates charging, boosts voltage, and supports solar input.
- Recommended Brands: Redarc, Victron, Enerdrive, Projecta.
- 4. Auxiliary Battery (AGM or Lithium)
- Your camping power source. Lithium is now standard in touring setups due to huge benefits.
- 5. Solar Panel(s)
- Roof-mounted or portable. Solar is essential for anything beyond a basic setup.
- 6. MPPT Solar Controller
- Often built into the DC-DC charger. Ensures solar feeds correctly into the system.
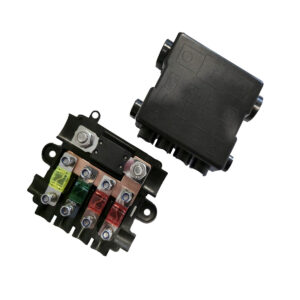
- 7. Fuse Junctions (Mega / Midi / Blade)
- Protects everything — especially high-draw devices like inverters.
- 8. Inverter (400W–3000W)
- For AC appliances: laptops, induction cookers, coffee machines, etc.
- 9. Anderson Plugs (SB50 / SB120)
- Used for high-current connections:
- Grey SB50 → general charging
- Red → solar
- SB120 → big inverters / caravan feeds
- Black → caravan charge feed
- Used for high-current connections:
- 10. Power Distribution Board / Canopy Power Box
- A clean hub for 12V outlets, switches, USBs, voltmeters, etc.
- 11. Earthing Points
- A proper earth is as important as positive wiring.
- 12. Cabling
- Wrong cabling = voltage drop = destroyed batteries.

How Does a Dual Battery System Work?
A dual battery system works by separating your vehicle’s starting power from your camping/touring power, so you can run accessories for hours—or days—without risking a flat starter battery.
It gives you two independent power systems inside one vehicle:
- Battery 1: Starts the engine (starter battery)
- Battery 2: Runs your accessories (auxiliary battery)
The two batteries communicate through a charging device but remain isolated so one can never drain the other.
Here’s the 2026, easy-to-understand breakdown:
1. Starter Battery (Cranking Battery)
This is the battery that:
- starts the engine
- powers your ECU
- runs factory electrics
It must always stay healthy so your 4WD can start reliably.
A dual battery system PROTECTS this battery by keeping it separate from your accessories.
2. Auxiliary Battery (Deep Cycle — Usually Lithium)
This is the battery that powers:
- fridges
- lights
- inverters
- compressors
- radios
- camp lighting
- 12V sockets & USBs
- canopy setups
In 2025, this battery is almost always Lithium (LiFePO₄) because:
- it charges faster
- it’s lighter
- it lasts longer
- it delivers more usable power
- it handles large loads (like inverters)
The auxiliary battery is isolated from the starter battery so your accessories can NEVER drain your engine-starting power.
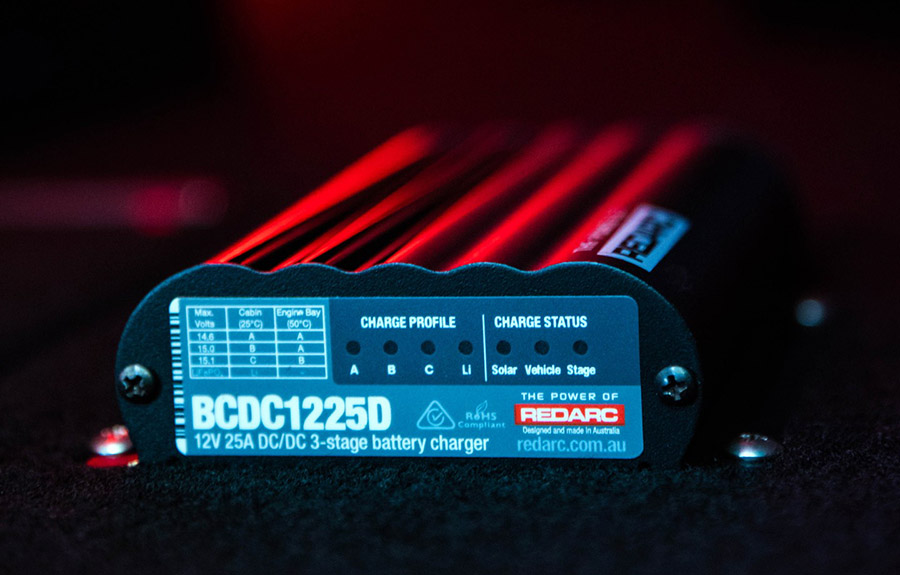
3. DC-DC Charger (The Heart of Modern Dual Battery Systems)
In older setups, people used isolators. Those are now outdated because smart alternators don’t produce stable voltage. Instead todays system running DC-DC charger from companies such as RedArC
A DC-DC charger does three critical jobs:
- Charges your auxiliary battery correctly
It boosts and regulates voltage to the exact level lithium or AGM needs. - Protects your starter battery
It isolates the two systems, so your accessories never drain the cranking battery. - Handles solar input
Most modern DC-DC chargers have built-in MPPT solar controllers.This means solar panels can plug straight into the charger.
In short:The DC-DC charger is what makes the entire dual battery system work safely and efficiently.
4. How Charging Works (Simple Explanation)
When your engine is running:
- Alternator produces power
- DC-DC charger pulls that power
- DC-DC charger boosts/regulates it
- Auxiliary battery gets the correct charging profile
- Starter battery stays isolated and protected
When the engine is OFF:
- The auxiliary battery continues powering your accessories
- Your starter battery remains untouched
- A solar panel can continue charging the auxiliary battery through MPPT
-
-17%
REDARC Alpha 50AMP DC Battery Charger
Original price was: $899.00.$749.00Current price is: $749.00. -
-18%
REDARC Alpha 25AMP DC Battery Charger
Original price was: $799.00.$659.00Current price is: $659.00. -
Hot
REDARC BCDC CORE In-Cabin 40A DC Charger (FREE 2x 60A MIDI HOLDER)
Original price was: $499.00.$399.00Current price is: $399.00. -
-24%

REDARC 12V 50A Classic Under Bonnet DC Charger (FREE 2x 60A Midi Holder)
Original price was: $869.00.$659.00Current price is: $659.00.
5. Solar Charging (Modern 4WD Reality)
Solar now plays a BIG role in dual battery systems:
- Keeps the auxiliary battery topped up while parked
- Runs fridges all day
- Reduces alternator load
- Perfect for multi-day camping
Most touring setups use:
- a roof-mounted panel for passive charging
- a portable blanket to move into the sun
Solar connects via the DC-DC charger’s MPPT input.
6. Smart Voltage Management (Automatic Protection)
Modern DC-DC chargers act like smart battery managers. They automatically:
- detect battery voltage
- isolate the starter battery when needed
- switch charge modes
- stop charging at correct voltages
- protect against over-discharge
- switch between alternator and solar seamlessly
These systems are almost always automatic, so beginners don’t need to manually switch anything.
7. Optional Manual Override (Jump or Link Mode)
Some advanced systems allow:
- emergency jump-starting
- linking both batteries together
- manual control for winching or high loads
This is optional but helpful in serious touring or remote travel.
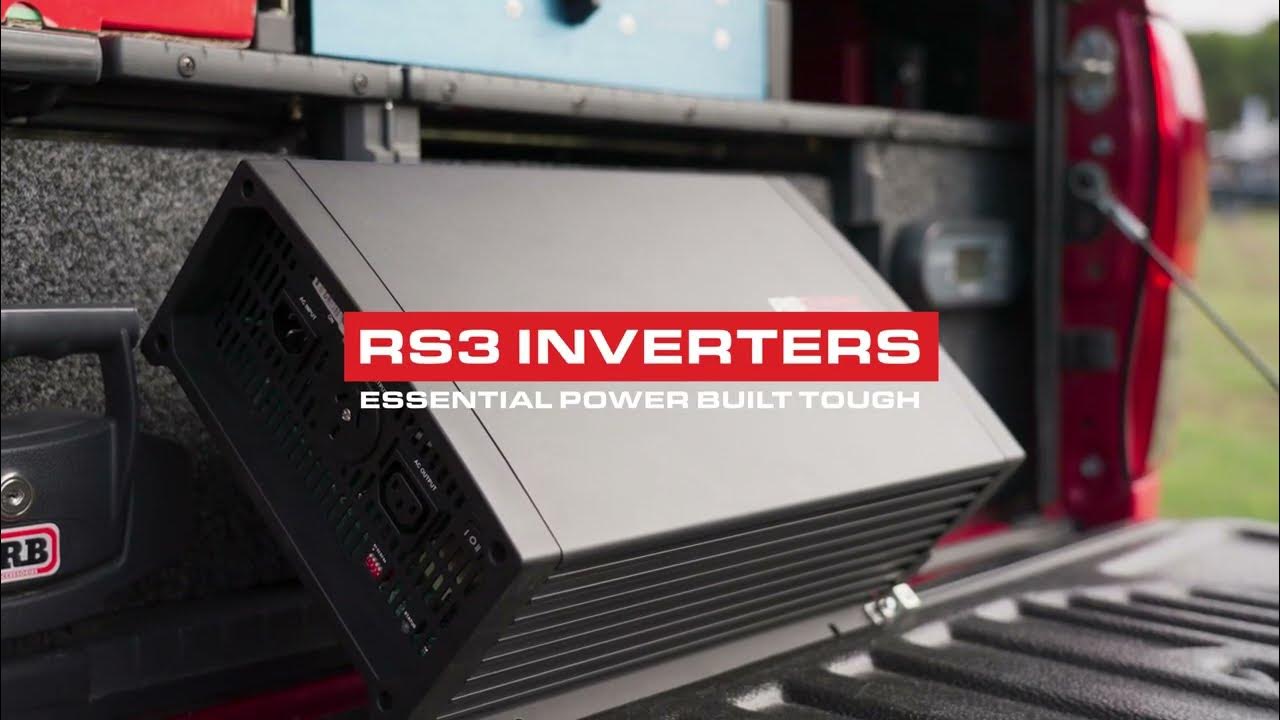
Inverters Explained — What They Are & Why 4WD Owners Use Them
Inverters are one of the most misunderstood parts of a 12V touring setup — but also one of the most important. They allow you to run 240V household appliances from your 12V auxiliary battery, turning your 4WD into a true off-grid power station.
A quality inverter takes the low-voltage DC power from your lithium battery and converts it into clean, safe AC power, the same type you get from a wall socket at home. This unlocks everyday gear like:
- Coffee machines
- Kettles and toasters
- Chargers and laptops
- Power tools
- Induction cooktops
- Small appliances
But here’s what most beginners don’t realise:
Inverters draw massive current on the 12V side.
A 2000W inverter can pull over 160A.
A 3000W inverter can exceed 250A.
This is why inverter wiring requires:
- Thick cabling (25–70mm²)
- Short cable runs
- Correct MEGA fusing
- A lithium battery capable of high discharge
- Proper ventilation and mounting
It’s not “plug and play” — it must be installed correctly to be safe. Inverters MUST be:
- Connected directly to the battery
- Mega fused
- Correct cable gauge
- Properly earthed
| Inverter Size | For | Notes |
|---|---|---|
| 400W | Camera gear, laptops, drones | No big appliances |
| 1000W | Tools, small chargers, fans | Good medium touring |
| 2000W | Kettles, coffee machines | Needs 150Ah+ lithium |
| 3000W | Induction cooktop, air fryer | Needs 200–300Ah lithium minimum |
Why Inverters Matter in Modern 4WD Power Systems
Touring setups have evolved from simple fridges and lights into full mobile kitchens and workstations. The modern 4WD owner wants to:
- Brew coffee on the go
- Cook on induction
- Charge power tools
- Run laptops and camera gear
- Power medical devices
- Replace gas entirely
Inverters make all of this possible — but only when matched to the right battery, charger, and wiring.
The goal of this section is to help you understand:
- What size inverter you actually need
- How much current it will draw from your battery
- How to wire it safely
- What fuse sizes and cables are required
- Whether your lithium battery is big enough
- Whether your alternator + DC-DC charger can keep up
Once you get this right, an inverter becomes one of the most powerful upgrades you can add to your dual battery system.
-
-17%
REDARC RS3 3000W 12V Pure Sin Wave Inverter With ATS
Original price was: $3,319.00.$2,749.00Current price is: $2,749.00. -
-15%
REDARC RS3 2000W 12V Pure Sin Wave Inverter With ATS
Original price was: $2,329.00.$1,989.00Current price is: $1,989.00. -
-12%
REDARC RS3 1200W 12V Pure Sin Wave Inverter With ATS
Original price was: $1,589.00.$1,399.00Current price is: $1,399.00.

How Much Current an Inverter Really Draws (12V Side)
Use this formula:
Amps = Watts ÷ 12 ÷ 0.85
(0.85 represents inverter efficiency)
Real Current Draw Examples
| Inverter | DC Current Draw |
|---|---|
| 300W | ~30A |
| 600W | ~60A |
| 1000W | ~95A |
| 1500W | ~130A |
| 2000W | ~175A |
| 3000W | 250–300A |
⚠️ Important: Most people underestimate these numbers, which is why their inverter trips or their cables melt.
Fuse Sizes Required for Each Inverter
| Inverter Size | Fuse Type | Fuse Rating |
|---|---|---|
| 600W | MIDI | 80A |
| 1000W | MIDI/MEGA | 125A |
| 1500W | MEGA | 200A |
| 2000W | MEGA | 250A |
| 3000W | MEGA | 300A |
Is Your Lithium Battery Big Enough For an Inverter?
Lithium batteries are the only sensible choice for inverters. Here’s what you need:
100Ah LiFePO₄
- Runs small 300–600W inverters comfortably
- Can run 1000W briefly
200Ah LiFePO₄
- Runs 1000–2000W well
- Can run coffee machines, small induction
300Ah+ LiFePO₄
- Recommended for 2000–3000W inverters
- Long run times
- Can run bigger devices safely
⚠️ Minimum Rule: Do NOT run a 2000–3000W inverter off a 100Ah battery. You’ll overload the BMS or trigger low-voltage cutouts.
-
-13%Hot
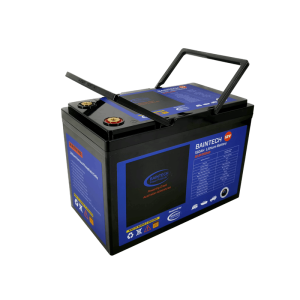
Baintech 12V 150AH Deep Cycle Lithium Battery with Bluetooth (LifePo4) *5 Year Warranty
Original price was: $1,499.00.$1,299.00Current price is: $1,299.00. -
-17%
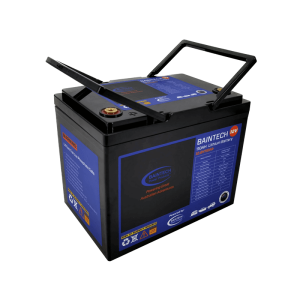
Baintech 12V 110AH Deep Cycle Lithium Battery with Bluetooth (LifePo4) *5 Year Warranty
Original price was: $999.00.$829.00Current price is: $829.00.
Can Your Alternator + DC-DC Charger Keep Up?
Here’s the truth: Your alternator and DC-DC charger do NOT power the inverter directly. Your battery does.
But your charging system matters because it determines how fast your battery recovers.
40A DC-DC Charger
- Puts back ~40Ah per hour of driving
- Good for 1000–1500W inverters
- Too slow for daily 2000–3000W use
60A DC-DC Charger
- Better for 200Ah+ systems
- Suitable for medium induction cooking setups
- Alternator Victron Orion or Redarc SBI (optional in very large builds)
- High-output builds (400–600Ah systems) may add alternator boosters
Solar
- Adds extra daily recovery but cannot power an inverter alone.
⚠️ Realistic Rule: If you run a large inverter daily, you need:
- 200Ah+ lithium
- 40–60A DC-DC
- Solar support
- Thick cable
- Mega fusing
-
-17%
REDARC Alpha 50AMP DC Battery Charger
Original price was: $899.00.$749.00Current price is: $749.00. -
-18%
REDARC Alpha 25AMP DC Battery Charger
Original price was: $799.00.$659.00Current price is: $659.00. -
Hot
REDARC BCDC CORE In-Cabin 40A DC Charger (FREE 2x 60A MIDI HOLDER)
Original price was: $499.00.$399.00Current price is: $399.00. -
-24%
REDARC 12V 50A Classic Under Bonnet DC Charger (FREE 2x 60A Midi Holder)
Original price was: $869.00.$659.00Current price is: $659.00.
System Fuses & Cable Sizes: What Protects Your Entire Setup
Fusing and cable sizing are two of the most important — and most misunderstood — parts of a dual battery system. A bad fuse setup can melt wiring, damage batteries, destroy inverters, or even start a fire. A good setup protects every component and ensures your system delivers full performance safely.
Why Fuses Matter?
Every high-current device in your 12V system must be protected by a fuse because:
- If a cable shorts out → the fuse blows
- If a device fails internally → the fuse blows
- If something overheats → the fuse blows
Without a fuse, ALL that current tries to exit the battery at once — and the weakest cable melts first.
So fusing isn’t optional. It’s the backbone of your safety.
Cable Size Guide (Matched to Fuse & Load)
| Device | Fuse Size | Cable Size |
|---|---|---|
| 3000W Inverter | 300A MEGA | 50–70mm² (0AWG) |
| 2000W Inverter | 200–250A MEGA | 35mm² |
| DC-DC 60A | 80A MIDI | 8–10mm² |
| DC-DC 40A | 60A MIDI | 8mm² |
| DC-DC 25A | 40A MIDI | 6–8mm² |
| Fridge | 15A Blade | 4–6mm² |
| Lights | 5–10A Blade | 2.5–4mm² |
| Compressor | 30A Blade/Midi | 6mm² |
| USB/12V Sockets | 10–15A Blade | 4mm² |
Fuse Types & When to Use Them
MEGA Fuses (High Current) Used For:
- 1500–3000W inverters
- Main battery protection
- Heavy Anderson feeds
MIDI Fuses (Medium Current) Used For:
- 25A, 40A, 60A DC-DC chargers
- Mid-size accessories
- Small inverters (400–1000W)
Blade Fuses (Low Current) Used For:
- USB/12V sockets
- Lights
- Fridges
- Small accessories
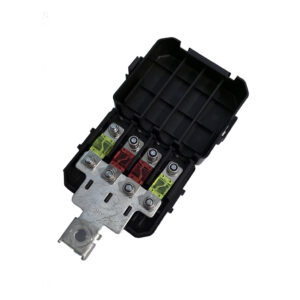
Fuse Holders (Don’t Skip This)
For high-current setups, proper fuse holders are just as important as the fuse itself. Cheap eBay holders melt, cause voltage drop, and can be a fire hazard.
Use proper MEGA, MIDI, and blade fuse blocks, or combined Mega/Midi junction boxes for canopy builds.
Recommended Fuse Holder Types:
- Mega fuse blocks / Mega junction boxes: Ideal for inverter feeds and main system protection.
- Midi fuse boxes: Great for DC-DC chargers and mid-draw accessories.
- Combined Mega/Midi distribution blocks: Perfect for canopy builds where you split high-current and mid-current circuits.
- Enclosed waterproof holders: For under-bonnet installs or harsh touring conditions.
For a full breakdown of all fuse holders, layouts, and junction boxes, see our Fuse Holder Guide below.
“Best Fuse Holders for Dual Battery Systems | MIDI & MEGA Guide 2026”
-
-22%
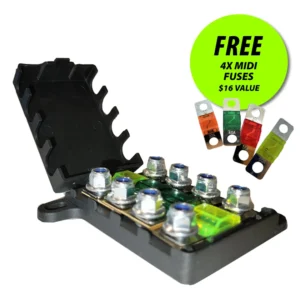
4 Way MIDI Fuse Holder – Direct to Lithium Battery Post Kit (Free Fuses)
Original price was: $69.00.$54.00Current price is: $54.00. -
-43%Hot

6 Way MIDI & MEGA Fuse Box Panel Junction – Red Copper Terminals – Includes Busbar ( FREE FUSES)
Original price was: $109.00.$62.00Current price is: $62.00. -
-25%Hot
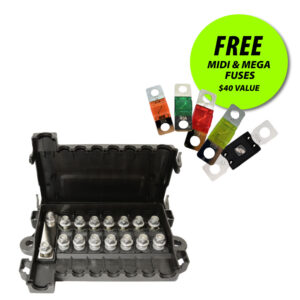
8 Way Mega & Midi Fuse Box – 1x Mega & 7 x Midi – Includes Busbar ( FREE FUSES)
Original price was: $119.00.$89.00Current price is: $89.00. -
-38%Hot
Quad Midi Fuse Holder With Busbar – Surface Mount – Up to 80AMP (Free Fuses)
Original price was: $45.00.$28.00Current price is: $28.00.
Pros & Cons of a Dual Battery System Setup
If you’re unsure if a dual battery system is right for you, consider these pros and cons.
PROS
- Allows your rig to power a fridge, radio, lights, inverters, and other accessories.
- No concern in draining your starter battery.
- Increases power available if you need to use your winch.
- Able to charge your secondary battery with solar panels.
- Peace of mind in case of primary battery failure.
CONS
- The added weight to your vehicle is due to an extra battery box.
- If you’re on a tight budget a dual battery setup can be a little expensive.
- Maintenance of your setup to make sure it’s in working order.
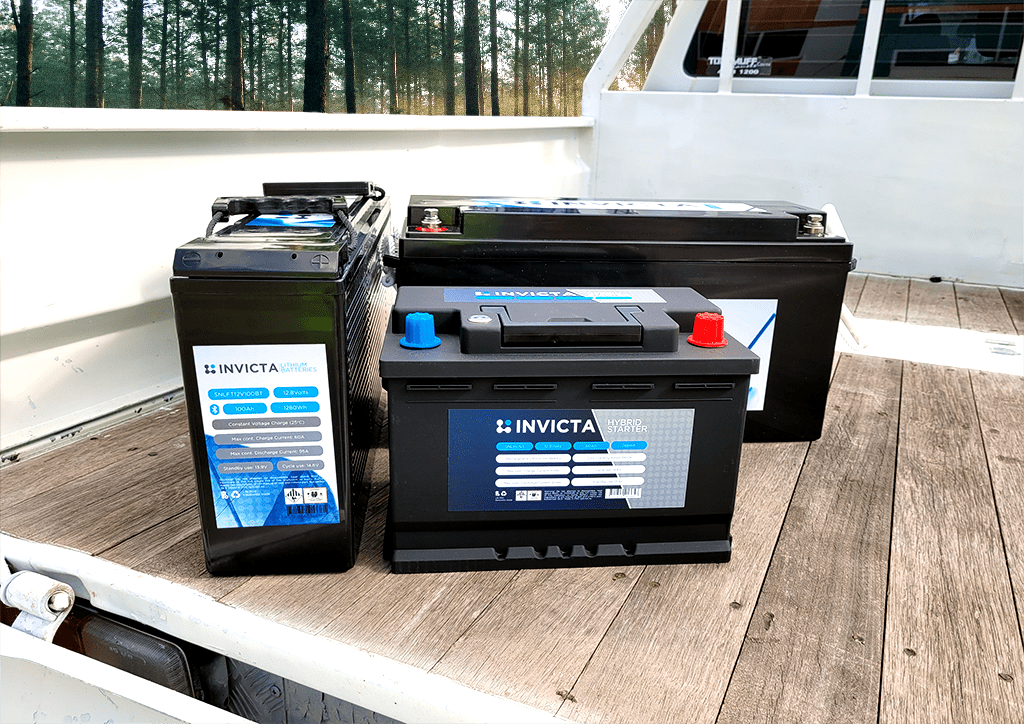
Different Types of Auxiliary Batteries
After assembling the remaining components of your battery kit, the next step is to select an auxiliary battery. In the realm of dual battery setups, you have a range of options for auxiliary batteries, each with its unique characteristics:
1. AGM Battery
The favored choice across various setups, AGM batteries are versatile due to their ability to charge without emitting hazardous gases. These batteries are best suited for scenarios involving partial use and recharge, rather than complete discharge and subsequent full recharge within a single usage cycle.
- Cheap
- Heavy
- Slow charging
- Only handles 50% discharge
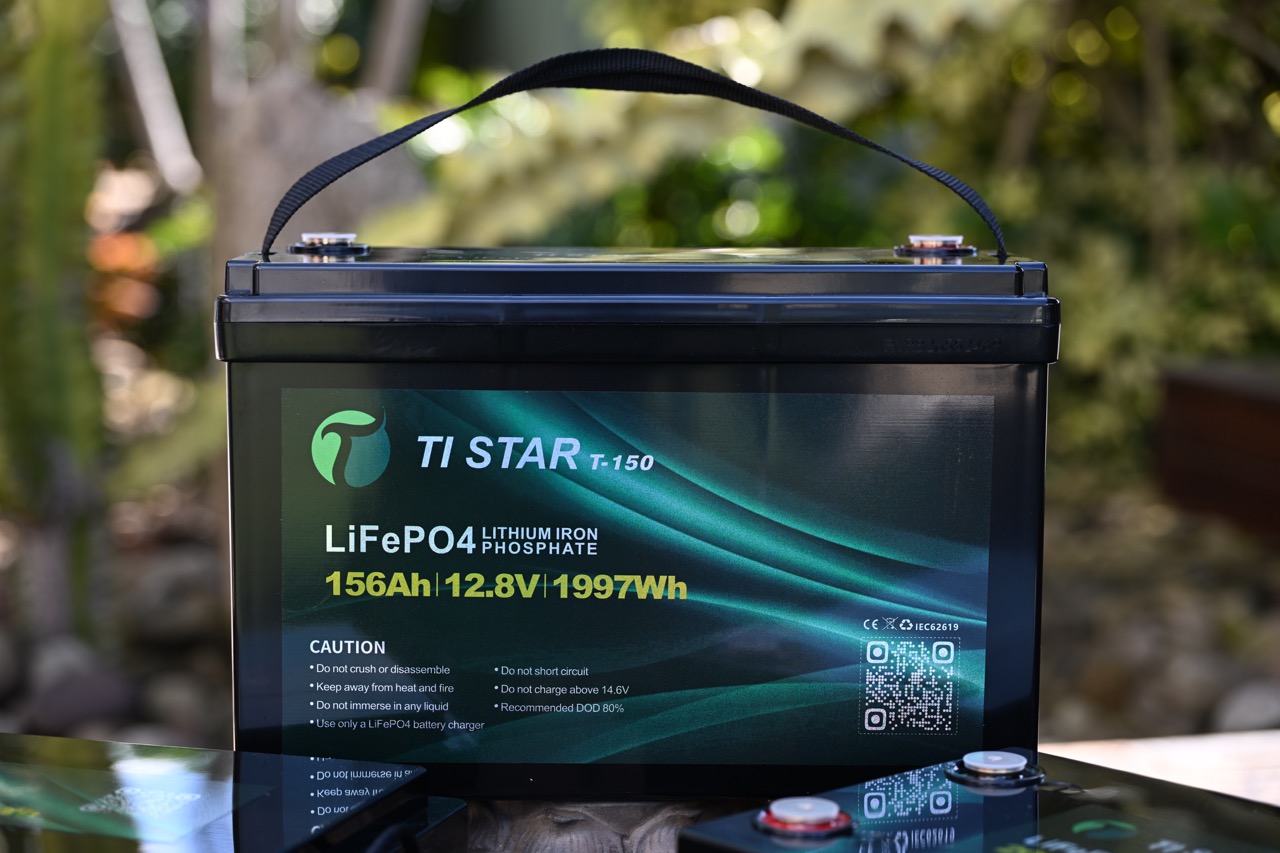
2. Lithium Battery (LiFePO₄) — The Standard
With the benefits of reduced weight and enhanced capacity, lithium batteries excel in durability, especially when employed in scenarios that involve partial utilization. It’s important to note that due to heat constraints, these batteries cannot be installed beneath the vehicle’s hood.
- 80–90% usable capacity
- Lightweight
- Charges fast
- Perfect for inverters
- Ideal for fridges
- Long lifespan
3. Lead Deep Cycle
Engineered to endure frequent deep discharges, deep-cycle batteries are designed to utilize a substantial portion of their capacity. These batteries are compatible for placement beneath the vehicle’s hood, in an open tray, or in a tub.
While they offer affordability, it’s worth mentioning that their lifespan can be compromised if not fully discharged and recharged during each use.
How to Keep Your Dual Battery System Running Smoothly
Like any component in your vehicle, your 4×4 dual battery system will suffer from wear and tear, especially if you’re heading off-road and facing the elements. To keep your charging system running smoothly, regular maintenance is required.
Here are some tips to help you keep your dual battery system running smoothly:
- Regular Inspections:
- Periodically inspect the battery terminals, cables, and connections for signs of corrosion or damage. Clean and tighten connections as needed.
- Check for any loose or damaged wiring in the dual battery setup.
- Battery Maintenance:
- Keep both the main starting battery and auxiliary battery clean and free of dirt and debris.
- For lead-acid batteries, check the fluid levels and add distilled water if necessary (if applicable).
- Follow the manufacturer’s guidelines for maintenance of the specific battery types in your setup (e.g., AGM, gel, lithium).
- Charging System:
- Ensure that your vehicle’s alternator is functioning properly. If you notice issues with charging, have it checked and repaired if needed.
- If you have a DC-DC dual battery charger, periodically check its operation and settings to ensure it’s charging the auxiliary battery effectively.
- Battery Isolation:
- Regularly test the isolator or battery management system to confirm that it’s working as intended. This might involve monitoring voltage levels and the charging/discharge behavior of both batteries.
- Usage and Discharge:
- Avoid running accessories or equipment for prolonged periods when the engine is off, as this could deplete the main starting battery.
- If you’re using power-hungry equipment, consider the battery capacity and usage time to prevent over-discharging.
- Balance Charging:
- If you have a dual battery setup with different battery chemistries or ages, consider periodically balancing the charge between the batteries. Some chargers have a feature for this purpose.
- Battery Load Test:
- Perform occasional load tests on both the main starting battery and the auxiliary battery to check their health and capacity. This can help you identify if either battery is deteriorating.
- Solar Panel Maintenance (if applicable):
- If your setup includes solar charging, keep solar panels clean and positioned for maximum sunlight exposure to ensure efficient charging.
- Driving Habits:
- Regularly take your vehicle for longer drives to ensure the alternator has the opportunity to fully charge both batteries.
- Emergency Jump Start:
- Always have the necessary equipment (such as jumper cables) on hand in case you need to jump-start the main starting battery.
- Documentation:
- Keep a record of maintenance and inspections for your dual battery system. This can help you track any issues and ensure regular upkeep.
- Seek Professional Help:
- If you’re unsure about any aspect of your dual battery setup’s maintenance, consult a professional mechanic or auto-electrician for guidance.
Remember that the specific maintenance requirements may vary based on the type of batteries you’re using, the components in your dual battery system, and how you’re using your 4WD.
Following these general tips can help you enjoy a reliable and efficient dual-battery system that serves your needs for years to come.
Dual Battery Installation Basics
DIYing a dual battery system is achievable if you understand the fundamentals of safe wiring, fusing, and correct charging equipment. Below is a simplified step-by-step guide for installing a DC-DC–based dual battery system — the only reliable method for modern 4WDs.
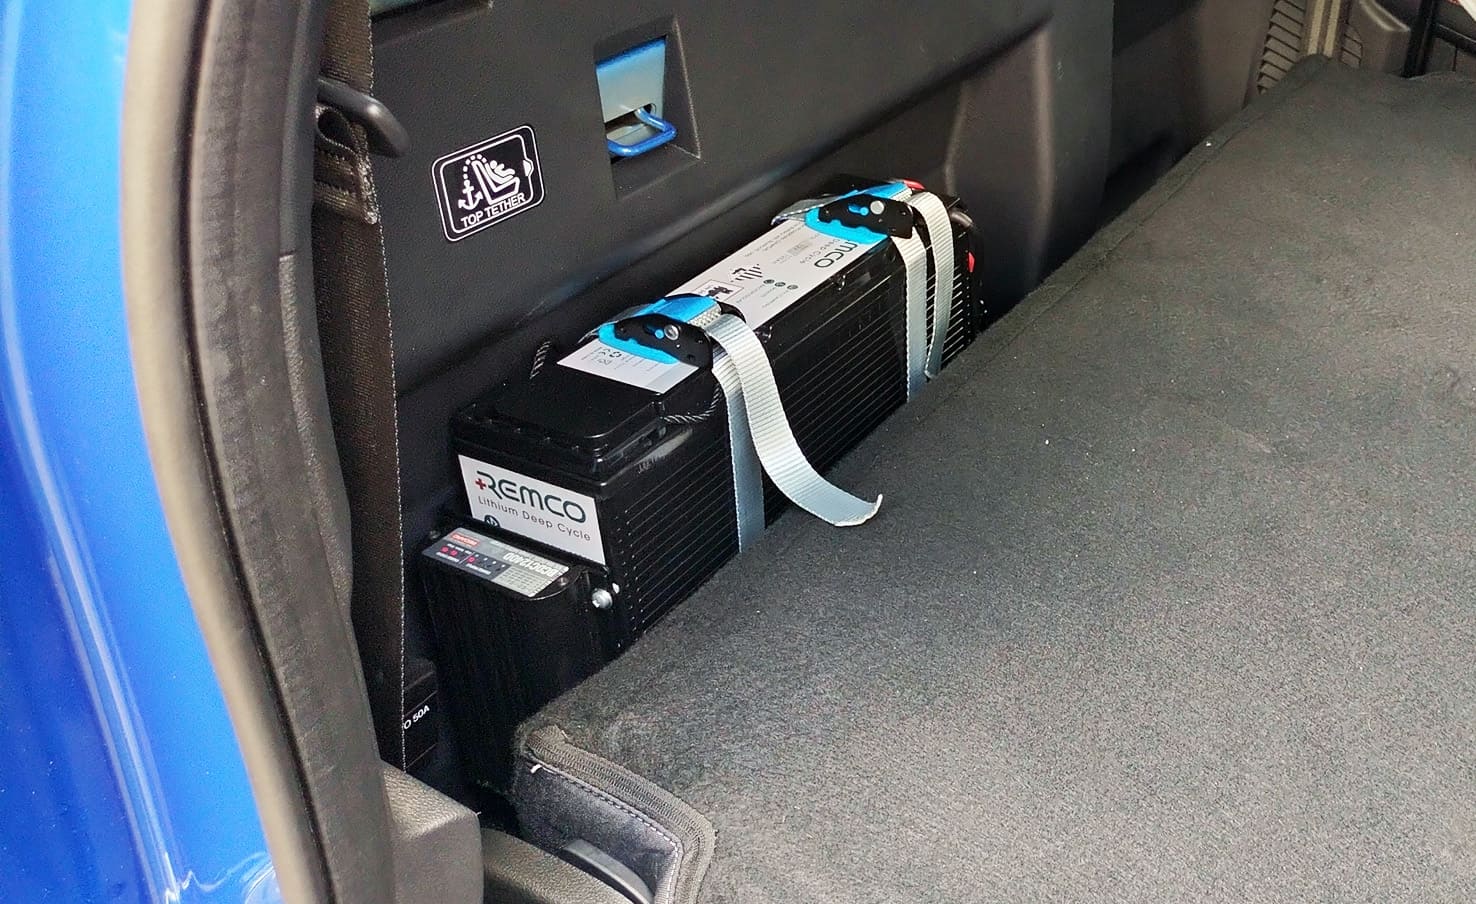
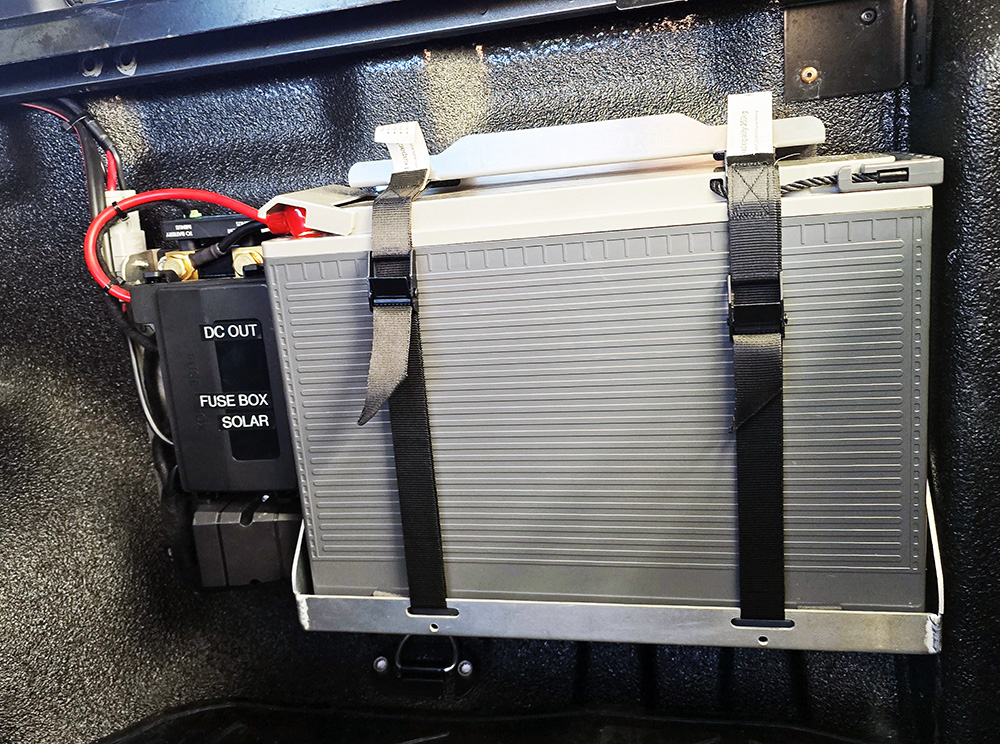
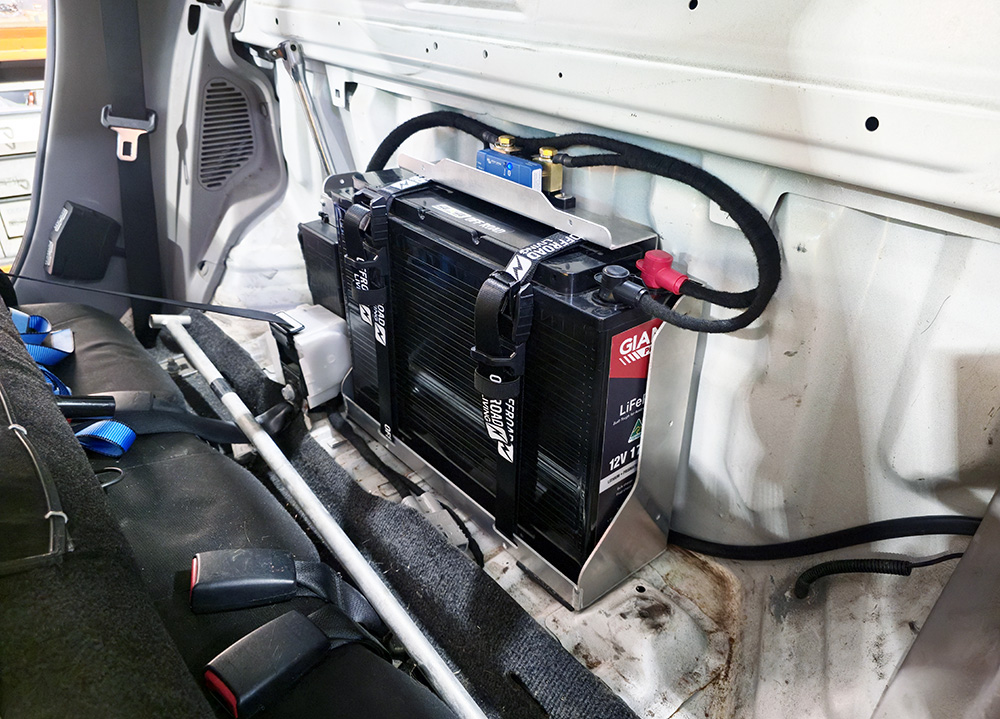
1. Choose a safe mounting location for the auxiliary battery
- Inside a canopy, battery box, or dedicated tray
- Avoid heat sources (exhaust, engine bay for lithium)
- Ensure the battery is secured properly
2. Disconnect the starter battery
- Always remove the negative terminal first to avoid short circuits.
3. Mount the DC-DC charger
- As close to the auxiliary battery as possible
- With airflow space (chargers produce heat)
- Avoid engine bay mount for most lithium/DC-DC chargers
- Ensure access for solar and alternator wiring
4. Install fuses at the correct locations
This is critical. You need:
- Input fuse near the starter battery
- Output fuse near the auxiliary battery
- Main system fuse between aux battery → fuse block
- Mega fuse for inverters
5. Run the main charge cable from starter → DC-DC charger
- Use correctly sized cable (8–10mm² for 40–60A chargers)
- Keep runs as short as practical
- Protect cable in conduit
- Secure with P-clips or cable ties
- Do not connect directly to alternator on modern vehicles — always off the starter battery.
6. Connect solar input (optional but recommended)
- Run solar cable to the DC-DC charger’s MPPT solar input
- Fuse the solar panel if required
- Ensure polarity is correct
- Use MC4 connectors for portable/fixed panels
7. Wire the DC-DC output to the auxiliary battery
- Use recommended gauge cable
- Install output fuse close to the battery
- Connect positive → fuse → battery
- Connect negative → chassis or negative busbar
8. Install your fuse block / distribution panel
This is where all loads connect. Never connect accessories directly to the battery.
From the auxiliary battery: Aux Battery → Main Fuse → Fuse Block → Loads
Typical loads include:
- Fridge
- Lights
- USB / 12V sockets
- Compressor
- Power board
- Anderson outlet
- Inverter (via Mega fuse)
9. Complete grounding
- Use a clean chassis earth or a dedicated negative busbar
- Avoid random bolts or painted surfaces
- Poor grounding = voltage drop, fridge cut-outs, DC-DC faults.
10. Reconnect starter battery & test the system
Use a multimeter to verify:
- DC-DC charger input voltage
- DC-DC charger output voltage
- Aux battery charging properly
- Solar input working
- All loads powering correctly
If you need expert assistance for installing your dual battery system, 4X4 OFFROAD provides both dual battery products and installation. Undecided on a dual battery system or need more information?
Our article on whether a dual battery system is right for you goes into more depth in regard to the products.
What is The Best Dual Battery System for Me?
When it comes to a dual battery setup, needs and requirements will vary from peer to peer. No one vehicle is the same nor is the person. The best dual battery system for you depends on several factors such as the intended use, vehicle type, power requirements, budget, and personal preferences.
Here are a few considerations and options you might explore:
- Usage: Determine how you intend to use the dual battery system. Are you using it for off-road adventures, camping, powering electronics, or running accessories like a refrigerator? This will help you understand your power needs.
- Vehicle Type: Different vehicles have different setups and available space for installing a dual battery system. Consider whether you have enough space for the system and whether your vehicle’s electrical system can handle the extra load.
- Battery Type: There are different types of batteries available, including lead-acid, AGM (Absorbent Glass Mat), gel, and lithium-ion batteries. Lithium-ion batteries are lightweight, have a longer lifespan, and can provide more power compared to traditional lead-acid batteries, but they are more expensive.
- Budget: Dual battery systems can range from relatively inexpensive DIY setups to more elaborate and costly professionally installed systems. Determine your budget and find a system that fits within it.
- Brand and Quality: Research different brands and models to find one with a good reputation for reliability and performance. Reading reviews and seeking recommendations from other users can be helpful in this regard.
- Features: Consider additional features such as built-in battery management systems (BMS), voltage sensing relays (VSR), solar charging capability, and monitoring systems. These features can enhance the functionality and efficiency of your dual battery setup.
- Installation: Depending on your expertise and comfort level with vehicle electronics, you may choose a system that you can install yourself or opt for professional installation.
Example #1 — BASIC WEEKENDER (FRIDGE + LIGHTS)
Use Case: 1–3 day camping trips, simple needs.
Recommended Gear:
- 100Ah lithium
- 25A DC-DC charger
- Midi fuse block
- 6–8mm² cable
- Basic solar (optional)
Pros: Cheap, simple
Cons: Limited to basic loads
Example #2 — TOURING / CANOPY BUILD
Use Case: Fridge, lights, charging devices, compressor, occasional 240V.
Recommended Gear:
- 150–200Ah lithium
- 25–40A DC-DC charger
- Roof solar (150–200W)
- Mega/Midi fuse junction
- SB50 Anderson
- Canopy power board
Pros: Handles most touring
Cons: Limited AC output
Example #3 — BIG LITHIUM POWER HUB (HEAVY DUTY)
Use Case: Induction cooking, coffee machines, tools, long-term remote travel.
Recommended Gear:
- 200–300Ah lithium
- 40–60A DC-DC
- 300–500W solar supply
- 2000W–3000W inverter
- SB120 Anderson
- 0AWG heavy cabling
- Proper earthing + mega fusing
- This is a full off-grid system.
Conclusion: Build Your Power System the Right Way
A well-designed dual battery system is the heart of any reliable 4WD touring setup. When it’s done properly, you get clean, stable power for your fridge, lights, tools, and accessories — whether you’re on the tracks, at camp, or living out of your canopy for days at a time.
But every vehicle, every battery, and every setup is different. The right system depends on your goals, the gear you run, how long you stay off-grid, and how your vehicle charges. That’s why there is no true “one-size-fits-all” solution.
This guide gives you a solid foundation to understand how everything works — from the alternator and DC-DC charger, to solar input, fuse protection, cable sizing, and power distribution. Once you understand the basics, you’ll make far better decisions about the parts you choose and how you configure your system.
If you’re ready to build a setup that’s safe, powerful, and tailored to your needs, the team at 4X4 OFFROAD is here to help. We design and install complete dual battery systems every day — from simple fridge setups to full lithium canopies with inverters, solar, power boards, and high-output charging.
Whether you need parts, advice, or a full turn-key installation, we’ll make sure your system is done right the first time.
Your adventure starts with reliable power. Let’s build it properly.
Book Dual Battery Installation Set-Up
When it comes to dual battery supply & fit, 4X4 OFFROAD can help pick the best dual battery system for your 4WD. Our expert technicians will also run through the best possible installation methods to get the best results. We offer dual battery setup products from RedArc, Tistar & Baintech and from our own 4X4OFFROAD products
This includes the following:
- DC-DC Chargers
- Anderson Plugs
- Lithium Deep Cycle Batteries
- LED Lighting Fitouts
- Solar Panels
- Switch Panels
- Management Systems
Along with the full installation of your Dual Battery Setup.
We will provide you with 4 potential setup options dependent on your specific needs and requirements, which include:
- Under Bonnet
- Behind the Seat
- Canopy
- In-Tub
- Portable
You can read our article 3 Best Locations for a Dual Battery Setup to get a better idea of what’s best for you.
If you want a custom setup and you’re located in Brisbane QLD, 4X4 OFFROAD can help you design the perfect system with:
- correct battery size
- correct charger
- correct fusing
- correct cable gauge
- inverter options
- solar integration
- anderson plug layouts
- full canopy fitouts
Don’t hestitate to contact us today. Fill out the Dual Battery Installtion Quote Form Here ==> https://4x4offroad.au/installations/dual-battery-system/


 No products in the cart.


Comment (1)