Fitting Instructions
- Remove the main ground from the negative (B-) battery terminal. WARNING: This may result in a loss of radio security code and clock settings. Consult your owner’s manual before disconnecting.
- Install driving lamps to vehicle on a suitable mounting surface away from exhaust system or turbo.
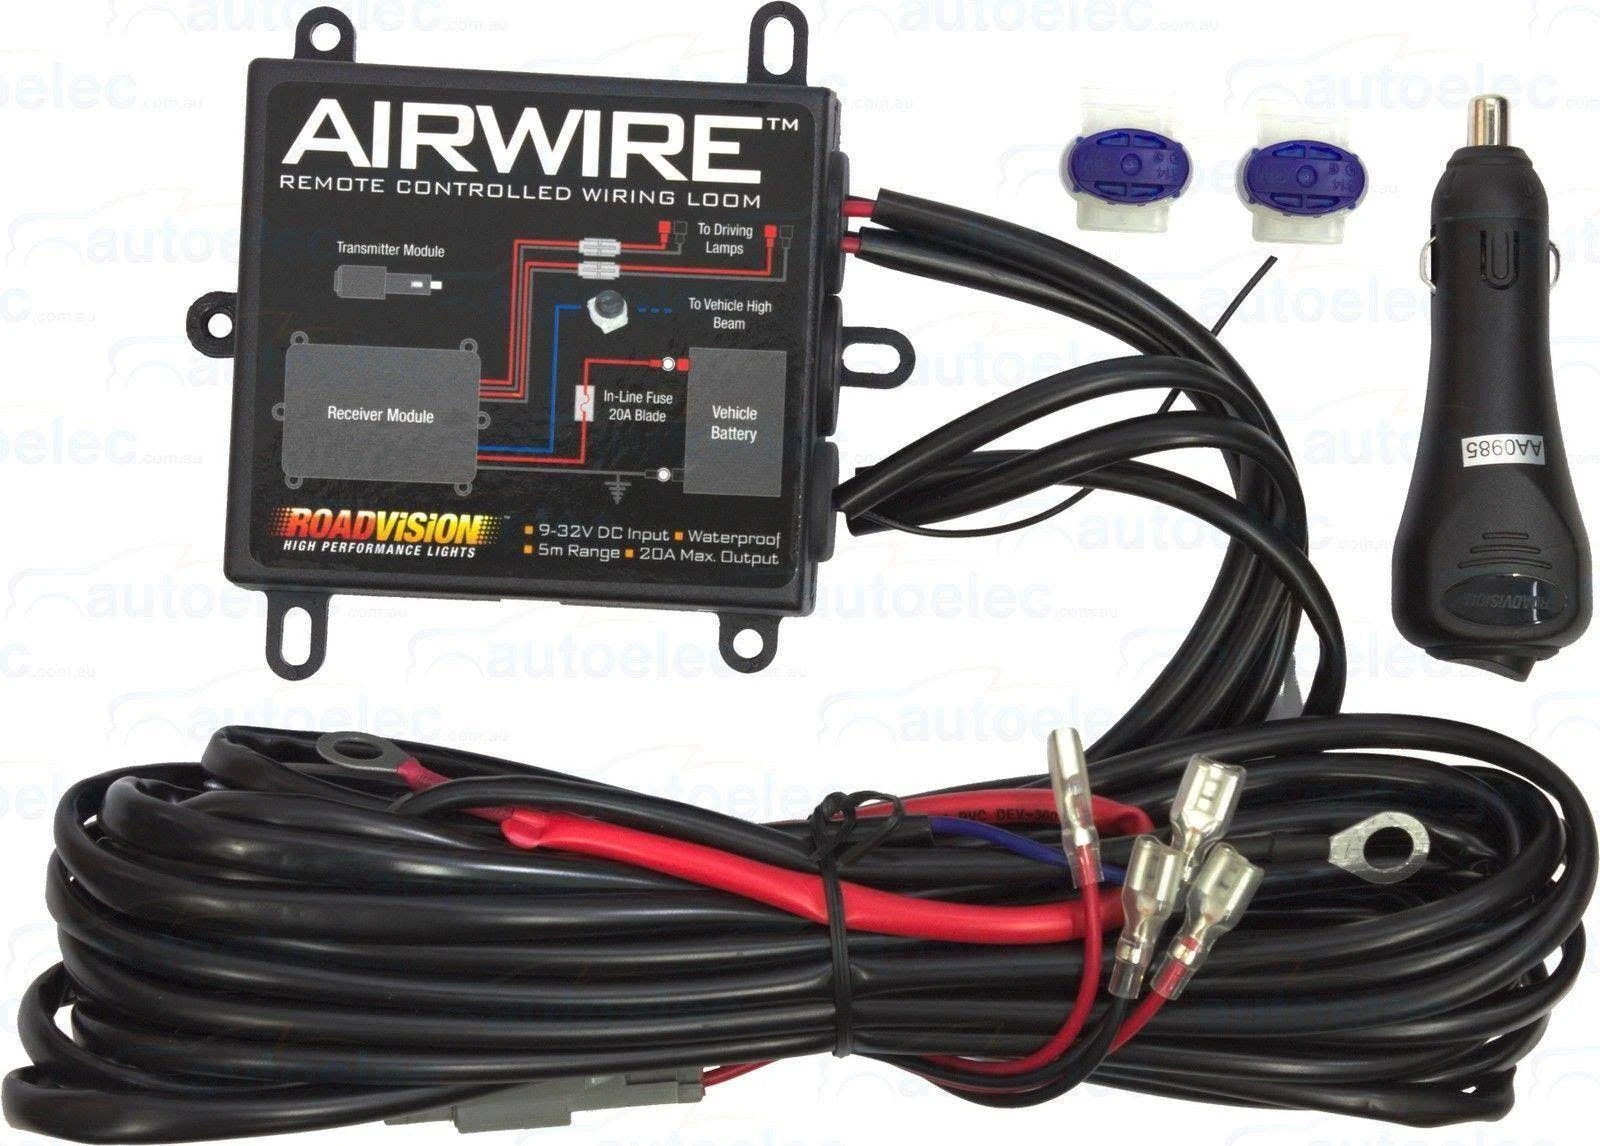
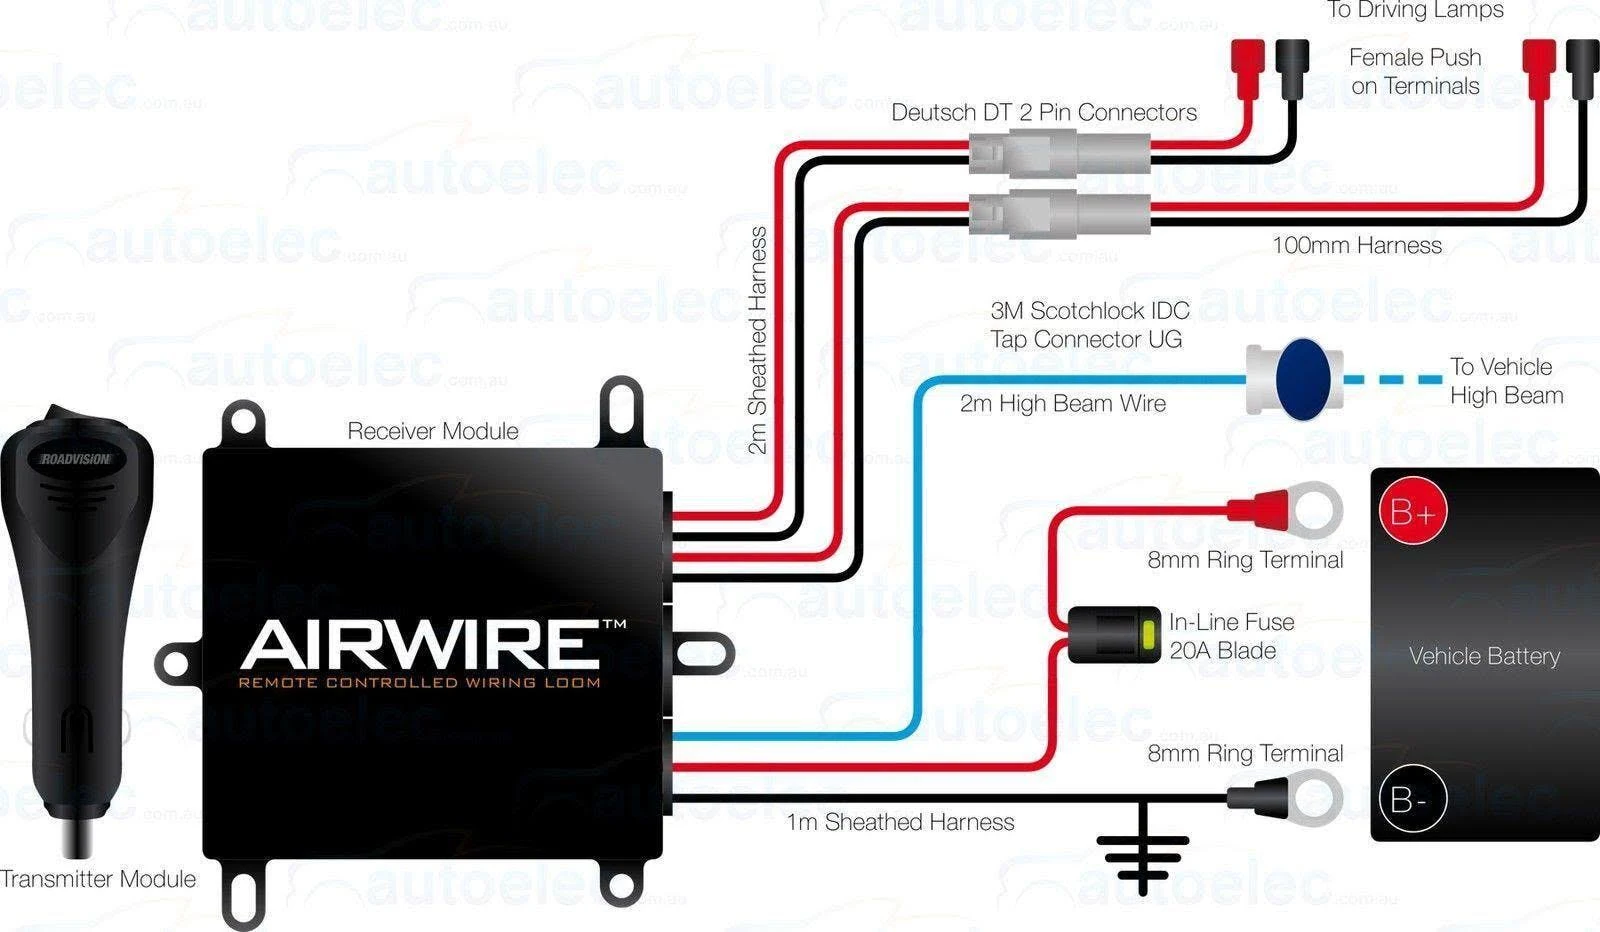
- Find a suitable place within the engine bay and mount the receiver box ensuring that the cables are long enough to reach the battery, driving lamps and high beam wire.
- Identify the driving lamp connection leads from the receiver module; these are fitted with 2 pin Deutsch connectors.
- Plug the driving lamp leads into your Roadvision driving lamps using either the 2 pin waterproof Deutsch connectors or female push on terminals. Take care to ensure the black lead is connected to battery negative input (B-) and red lead is connected to battery positive input (B+) to your driving lamps.
- Identify the blue high beam feed wire from the receiver module.
- Using a multimeter or test light find the active high beam switching wire located at the back of the head lamp.
- Cut wire in a suitable position and feed both ends along with the blue high beam feed wires into the supplied 3M Gel filled connector. Crimp connector with a suitable pair of pliers.
- Identify the main battery connection leads from the receiver module; these are fitted with 8mm ring terminals.
- Connect the 8mm battery positive (Red B+) and battery negative (Black B-) leads to the vehicles main battery terminals using the 8mm ring terminals.
- Re-connect the main battery negative (B-) terminal
- Secure all excess wire to the vehicle.
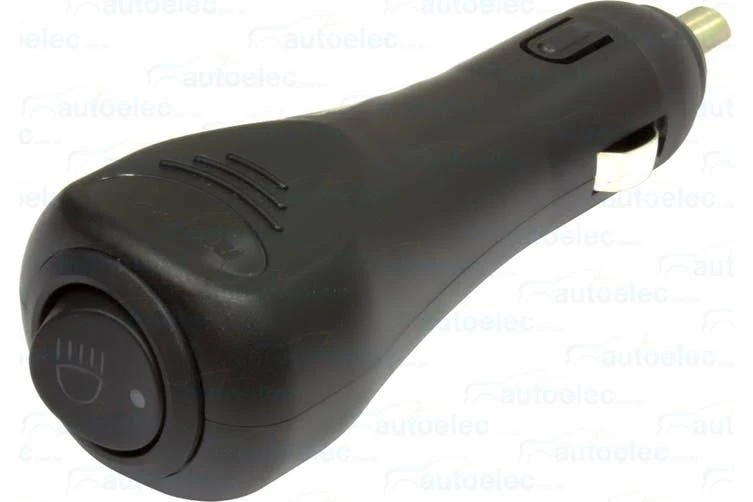
- Plug in the cigarette lighter transmitter module into your cigarette lighter plug inside the vehicle.
- Test the driving lamps by turning on the ignition, transmitter switch to ON and head lamp switch to high beam.
If the lights do not operate correctly, check the following:
- Check switch operation – Green LED illuminated with lamps OFF and ignition ON, red & green LED’s illuminated with switch ON and ignition ON.
- Check that you have followed all installation steps
- Inspect the fuse holder for blown fuse
- Inspect battery terminal connections
- Check 3M Gel filled connector connection
Note 1: This wiring harness is designed for use with 2 lamps only not exceeding 10 amps per light or a maximum output of 20 amps.
Note 2: By law in Australia, driving lamps must be operated through both the vehicles high beam circuit and an additional ON/OFF switch.
For applications outside Australia or where driving lamps are not being connected, simply connect the blue high beam feed wire to battery positive (B+).